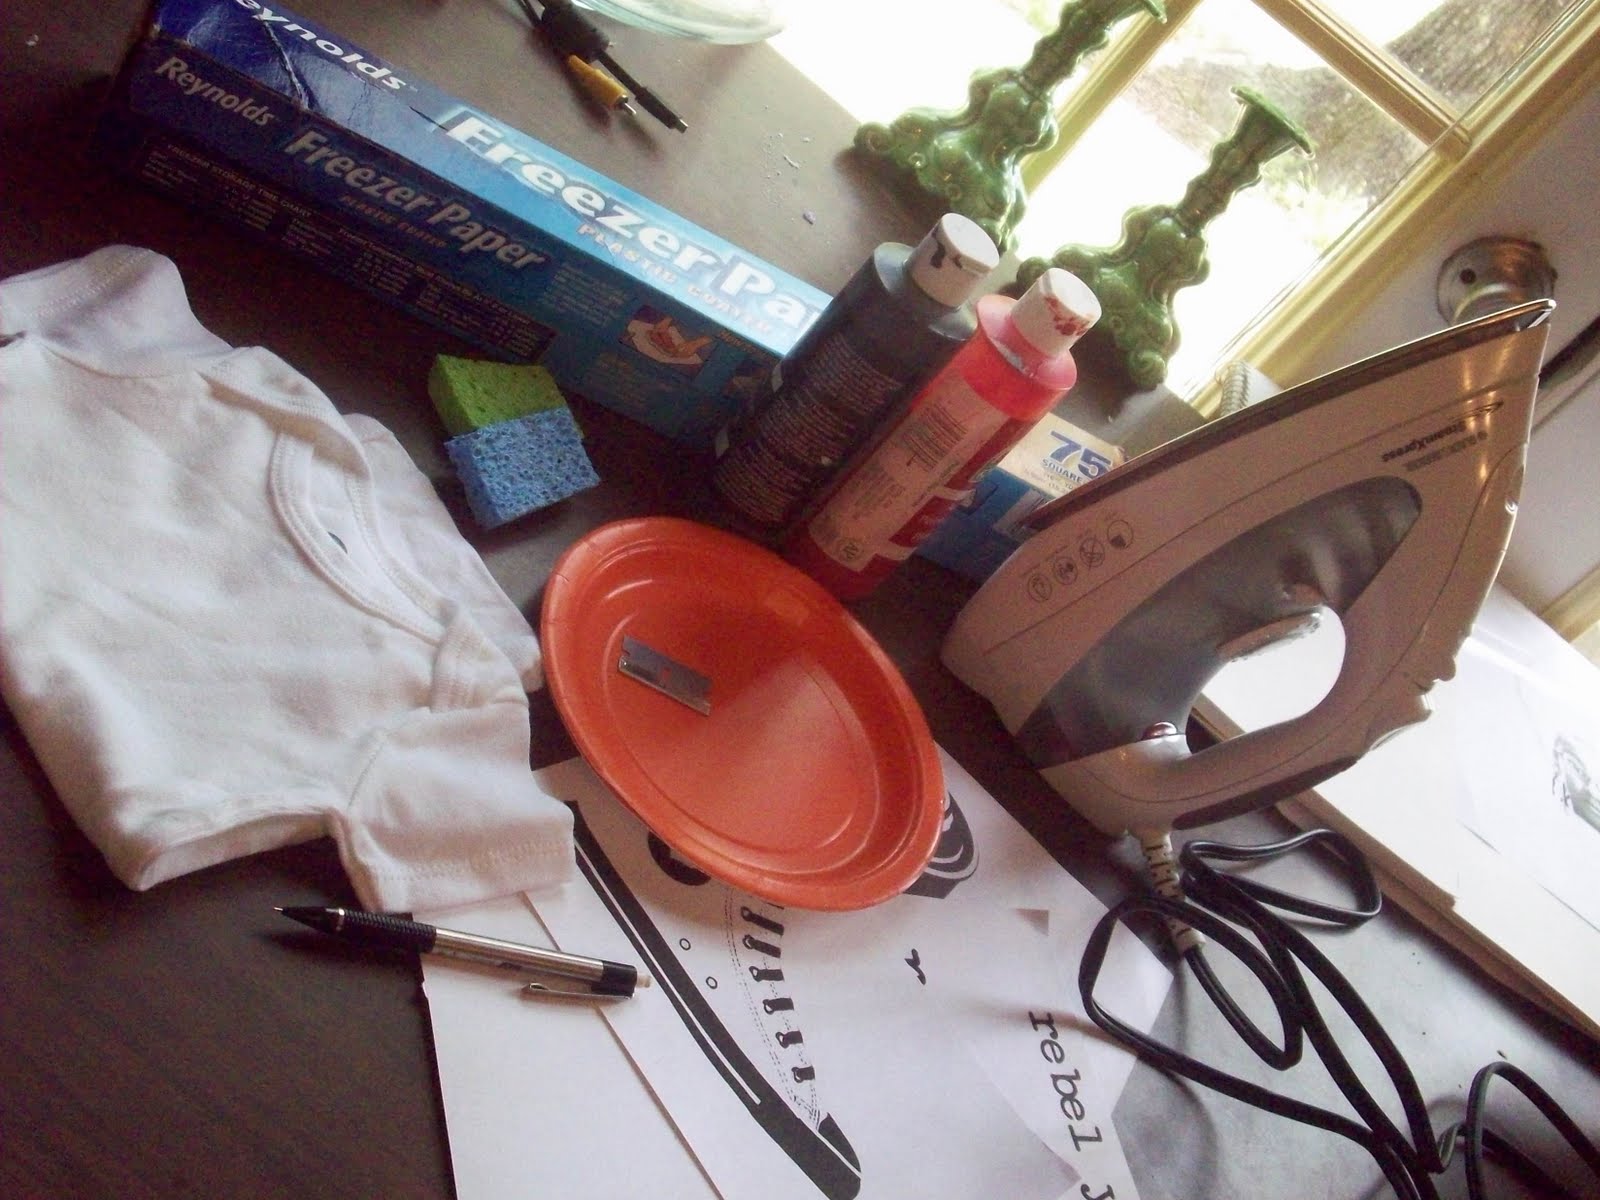
Materials (also known as stuff you're gonna need):
freezer paper
razor blade or exacto knife
acrylic or fabric paint
pencil
iron
sponge or stiff brush
something to stencil (of course)
 So this is the image that I chose to do. I'm using the smaller words because it's going on a onesie. Words can be a pain because you have to keep up with all of the little cutouts from letters like "o", "e", "b" etc. So, keep that in mind when you are deciding on an image.
 Trace your image onto the freezer paper. You can see through the freezer paper easily. Okay, if you've never seen freezer paper, it's matte on one side and glossy on the other. Trace on to the matte side.
 Using your blade or knife, carefully cut out your image.
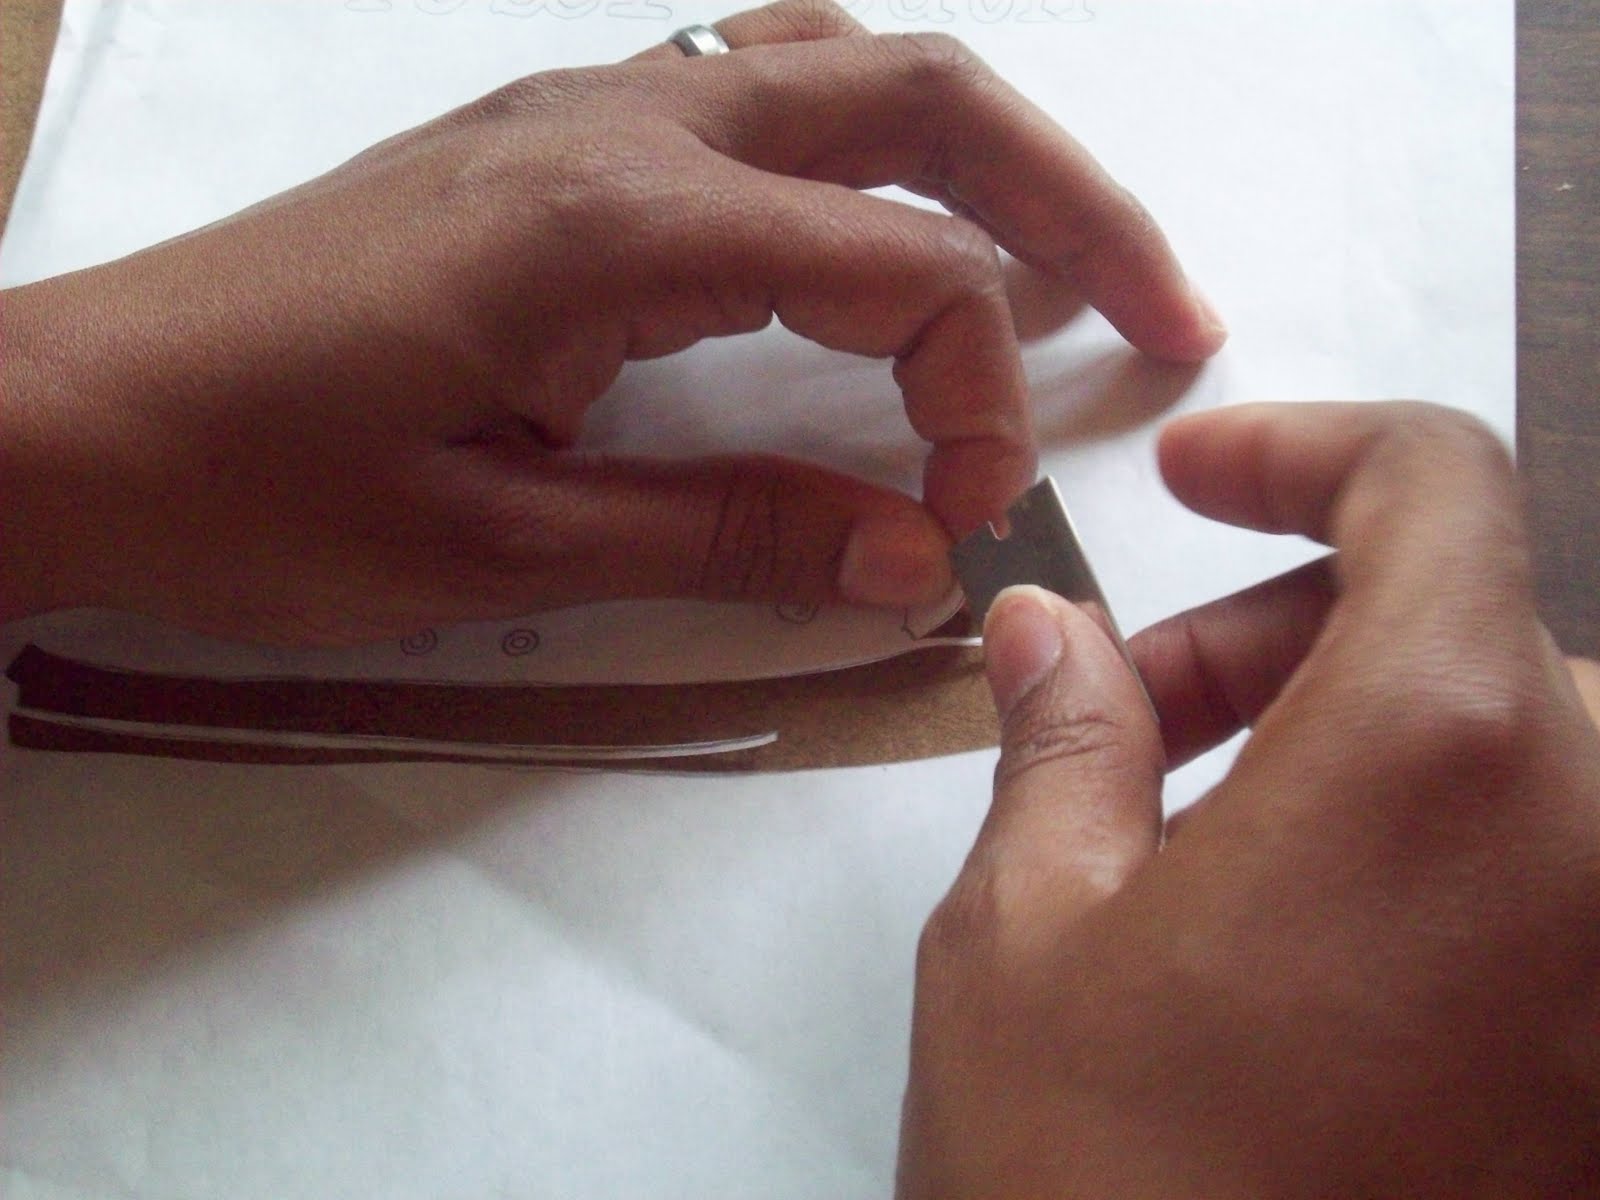 I was going to cut out all of the little openings in the grommets of the shoe, but I decided to spare my sanity.... Remember to keep up with the cutouts for your letters (if you do letters).
 So once you've cut out the image, this is what it looks like. I decided that I wanted a star on my sneaker instead of a heart.
 Now, place the stencil glossy side down onto the surface of your object to stencil. I put the iron on the cotton setting because, well, the onesie is cotton. Use whatever setting is appropriate for the fabric you are using. Press the paper with the iron. It only takes a few seconds for the paper to stick. Make sure that it is secure all over or it will come up when you start painting.
 I'm using regular acrylic craft paint because it's what I have. You can wash it a gazillion times and it'll never come off (trust me). You can use fabric paint if you prefer.
 Use a piece of cardboard inside your shirt or whatever to keep the paint from soaking through to the other side. If you forget, you will get paint EVERYWHERE. I forgot here, but remembered before I messed anything up.
 Use your sponge to cover the entire image with paint. You can use more than one color if you'd like, but I stuck to black for the sneaker.
 Some instructions say to leave the stencil on until the paint dries, but I need instant gratification. I rip that bad boy off as soon as it's sufficiently covered.
 Viola!
 Okay, so the shoe is on the back of the onesie and the wording in on the front. I opted to do the letters in red.
 Paint thoroughly....
 peel...
 Voila, take two!! Rebel Youth onesie numero dos!
 With awesome Chuck Taylor on the butt. (oh, I added the stitch detail with a brush)
 So hopefully that helps everyone to make their own fabulously unique shirts, bags, pants, and whatever else your little heart desires. Alright then, go make some stuff!!! And send me pictures of what you do!
Great tutorial, Adrienne. Thank you. I'm thinking we will have to try this out soon. I think this will look great on a tie-dyed shirt now that the weather is warming up. :)
ReplyDeleteHi There! That's a great tutorial! But, you know what? I'd still screw it up-LOL-I am so not crafty! Just popping in from the UBP to be your newest Google Follower! Hooray! Hope you have a great weekend! Swing by my blog when you get a chance!
ReplyDeleteBridgette Groschen
The Groschen Goblins
www.groschengoblins.com
Looks like something I might want to attempt some time.
ReplyDeletenice tutorial! I like the artwork. The baby who gets to wear it will be one stylin little babe.
ReplyDelete